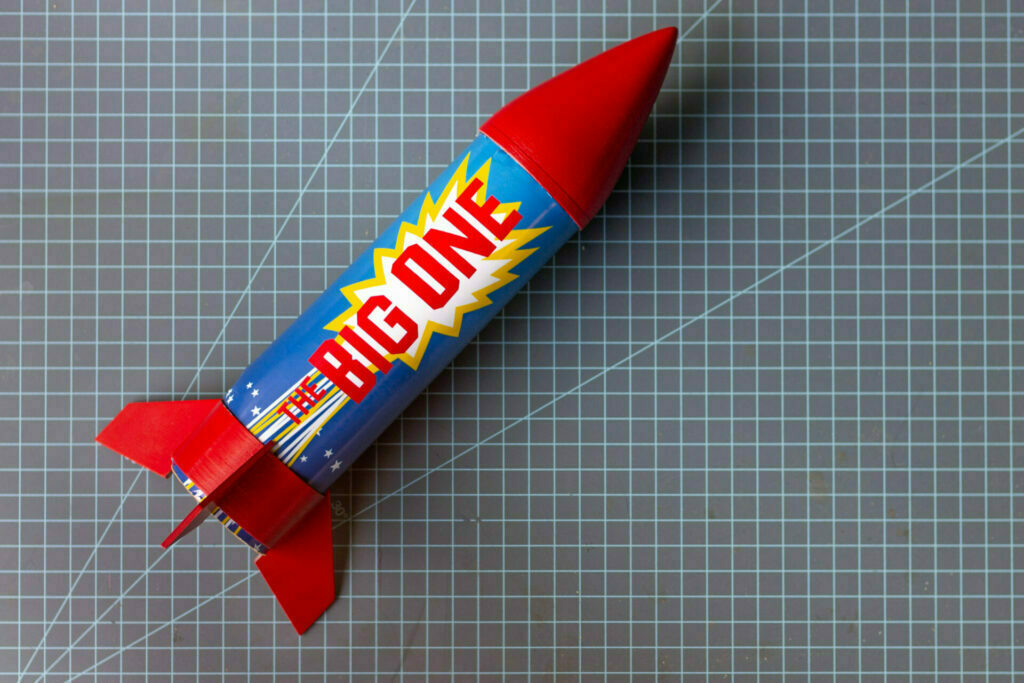
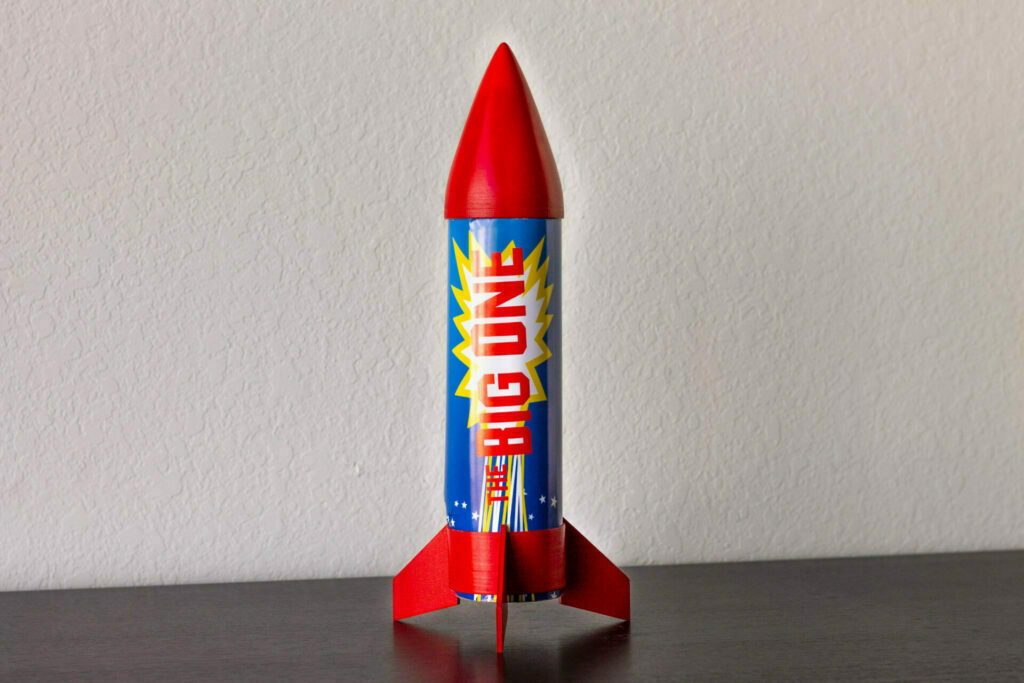
I knew right from the get-go which prop I wanted to do from the 99th movie on the AFI Top 100 Movie list! I didn’t want to make one of the main characters from Toy Story. That seemed like a bit much of a challenge for trying to crank out a prop on a short deadline and an invitation for a legal battle from Disney for replicating one of their best selling toy lines. But I still wanted something critical to the movie. Something that epitomized the look and feel of the first Toy Story. Something like... THE BIG ONE.
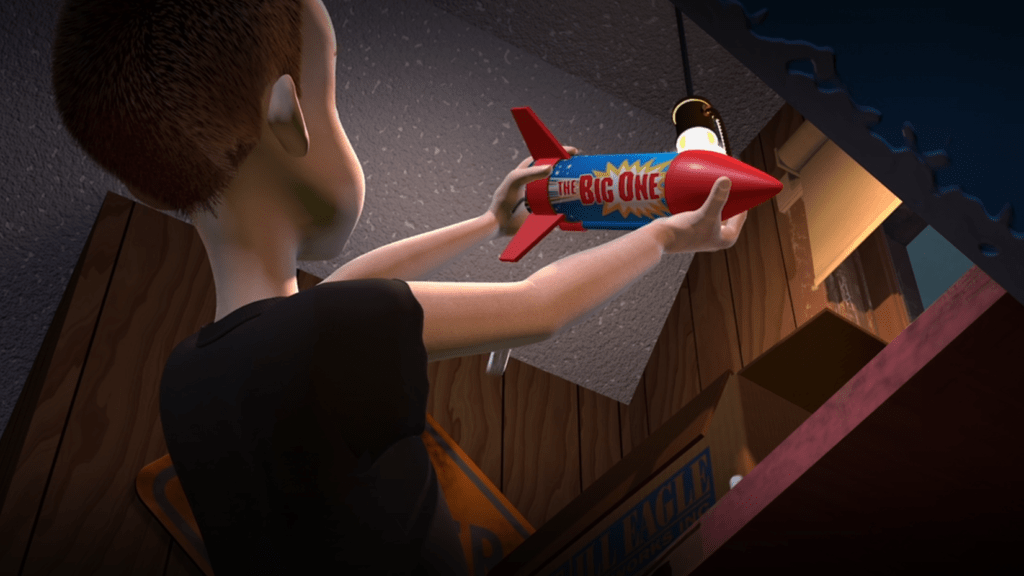
Yeah. I loved the look and feel of this giant firework in the movie and really wanted to add it to my budding collection of handmade movie props. I recently purchased a new FDM 3D printer that can print bigger models than those that I could print in my Elegoo Mars Pro resin printer. Now I was thinking that this large rocket would be the perfect thing to experiment with printing larger prints.
An aside about FDM vs SLA 3D Printing
Alright. If you don’t really care about the technical details behind 3D printing, you can go ahead and skip this portion of this blog post and move on to the next subheading. But if you’re wondering why I would buy another 3D printer when I already had one, this is the section for you.
It boils down to the method of printing between the two printers. My old Elegoo Mars Pro printer printed by way of SLA printing. This works by using a liquid resin that becomes solid when you expose it to UV light. The printer uses a smartphone screen on the bottom of a pool of that liquid resin that shoots out UV light instead of all the regular colors like your typical phone screen. The printer will take a 3D model from my computer that is sliced into a bunch of horizontal layers. Then it goes through each layer, one-by-one, and projects the shape of that layer, using that UV screen, into the pool of resin. The resin hardens in the shape that the printer projects and then we lift the solid body up and cure the next layer of liquid resin that fills in underneath. Do that a bunch of times and you have your 3D shape solidified out of a pool of liquid! Pretty cool stuff!
The nice thing about this printer is that it can be incredibly accurate with tiny details on the prints. Think about how sharp an image can look on your phone. That same sharpness can be carried over to the 3D prints because they’re being made by basically the same technology.
But! There is a big disadvantage to using resin for 3D printing. It’s very brittle. Resin prints, while highly detailed, can easily be broken apart. They’re also incredibly messy to process because the liquid resin is highly toxic and you don’t want to get any of it on your skin. So the entire cleaning process is a complete mess of having to use nitrile gloves while washing everything down with isopropyl alcohol (which was HARD to find during the pandemic).
There is another type of 3D printer though! And that is an FDM printer. An FDM printer works on a completely different premise than a resin SLA printer. Both of them start out with slicing the 3D model on the computer. But this type of printer takes a long string of meltable plastic and feeds it through a nozzle and a team of motors basically draw out each layer of the 3D print on a print bed with this melted plastic.
Basically think of using a hot glue gun. Rather than shooting out glue, the gun shoots out plastic that quickly cools. Now, instead of moving the hot glue gun around yourself, use a couple motors to move the gun around in the outline of the shape that you want. Do that a bunch of times, layer by layer, and you have your 3D print!
Back to the matter at hand
Alright, that’s enough about 3D printers. Now let’s talk about actually using this printer I got.
First things first, I needed to design The Big One.
Taking a look at The Big One and walking around the house to compare holding cylinders (candles, bottles, etc) I found a rough approximation that the diameter of the rocket should be around 2 1/2 inches. With that, I went to eBay and found a cardboard tube that was the right diameter and got it delivered to me.
3D modeling
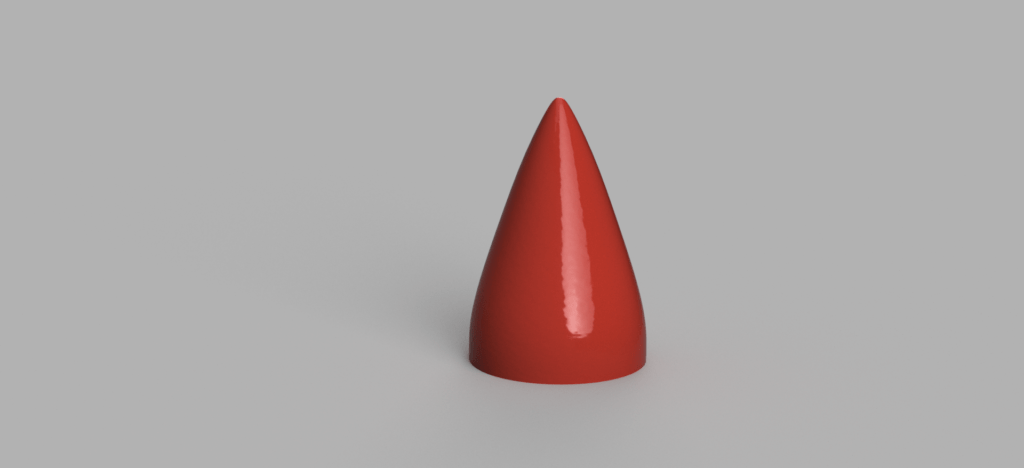
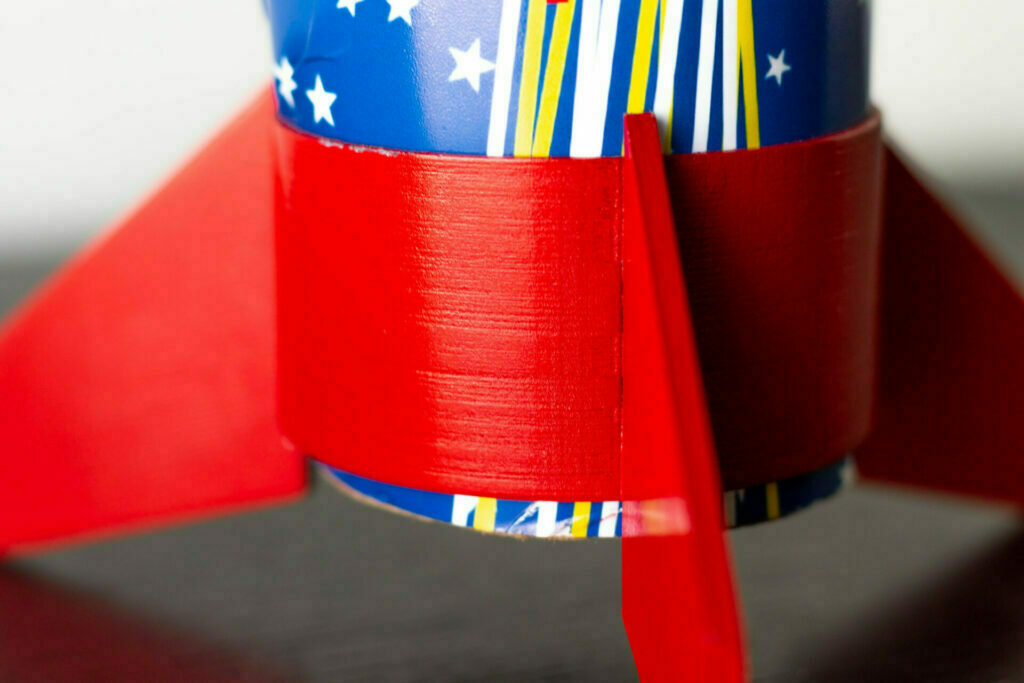
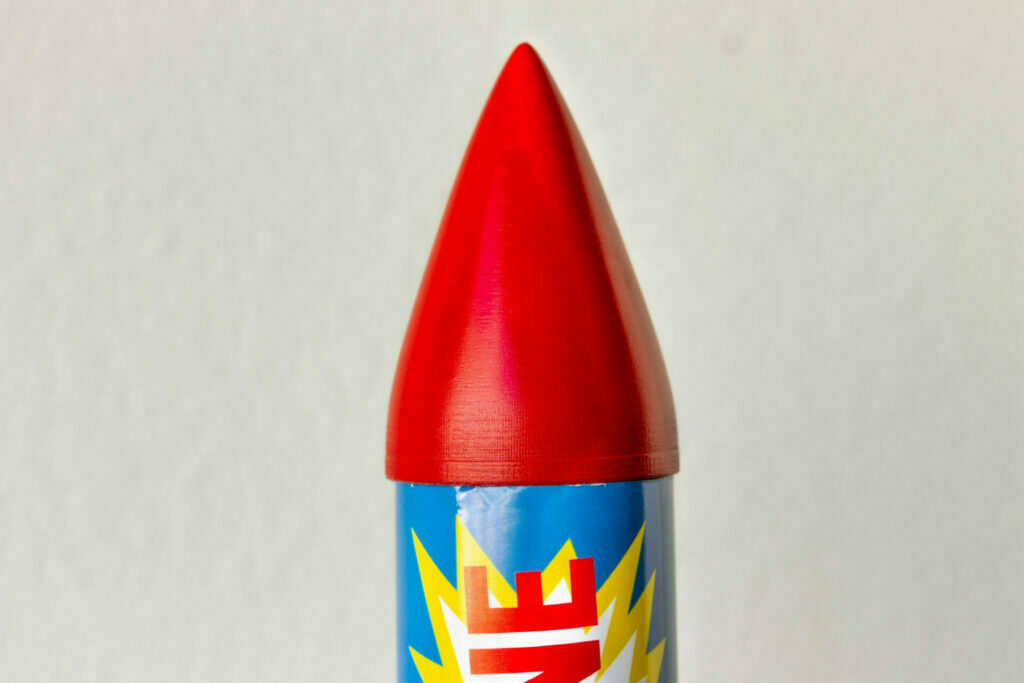
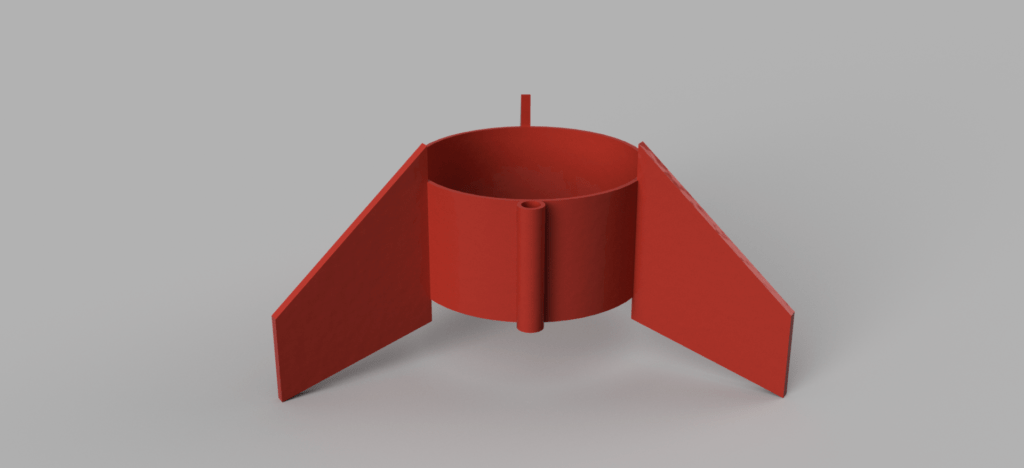
After experimenting and learning a little bit last week, I decided to use Fusion 360 again to accomplish the task of modeling the nose cone of the rocket and the tail fin assembly. I was able to design the cone fairly quickly by tracing the outline of the cone from a screenshot of the movie and then using the circularize tool to turn that outline into a solid 3D shape. With a little editing of the shape, I made sure that the cone would be able to slot over the 2.5 inch cardboard tube that I had shipping to me.
I used the same trick of tracing the screenshot to design the three fins that surround the base of the rocket. I know that the screenshot that I was using wasn’t exactly square with the rocket in the picture, but for the sake of recreating this prop for myself, it’s close enough. After drawing out one fin and extruding it to be the thickness that I felt was right, it was time to work on making the ring that the fins attach to. This was much easier than the other two parts because I simply had to make two circles, one the size of the outside diameter of the cardboard tube and one that was the tube diameter plus a couple mm of thickness, and then extruded the ring that I made to the right height. To approximate the height, I took the screenshot into Photoshop to measure the length of the rocket and measured the length of the tail-fin ring. Then with the help of some quick math and using some ratios, I was able to find the height of the rocket based on the fact that the width of the rocket was going to be 2.5 inch. Then with the height of the rocket known, I could apply that to the ratio of tail-fin-ring-height to the total height of the rocket. Et Voila… I had the length of the rocket and tail ring ready to go!
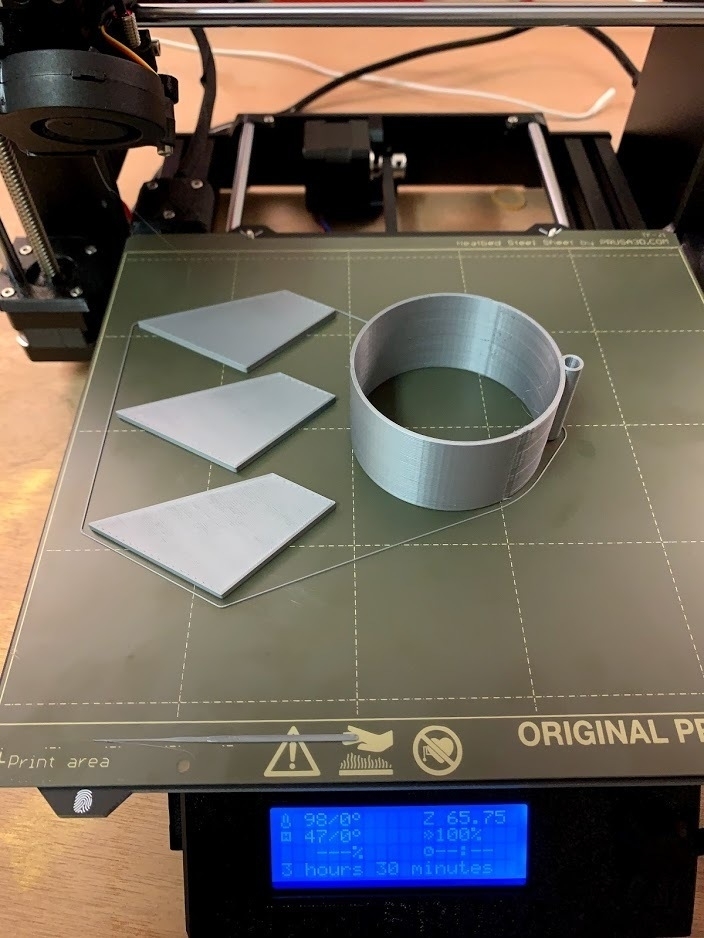
I got those 3d models ready to print out and started to get the print going while I started working on the next step: the graphics.
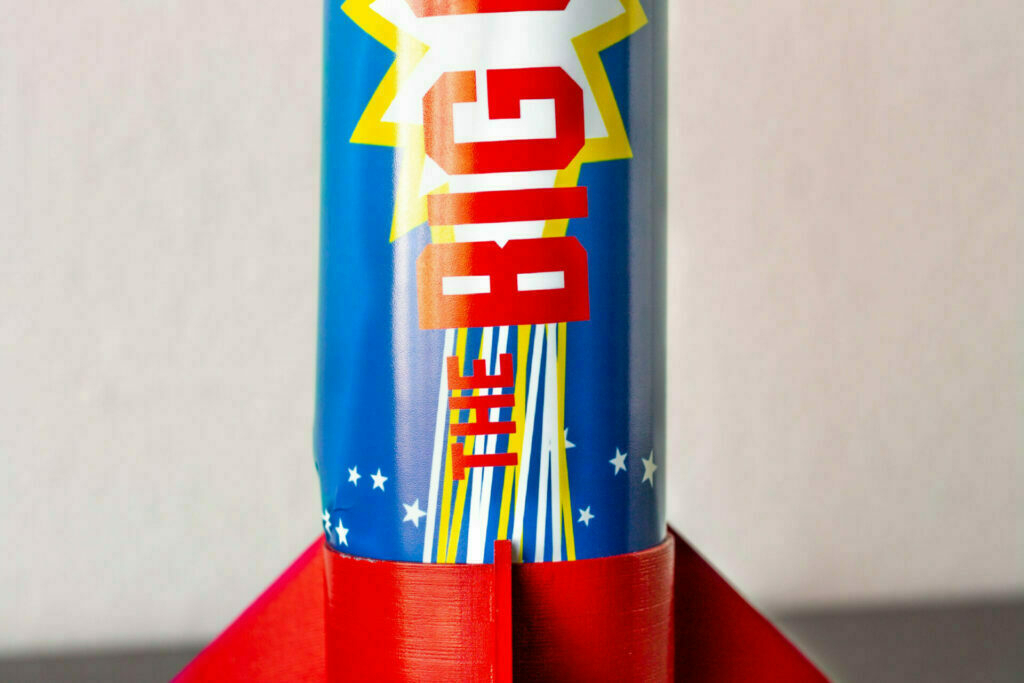
2D graphics
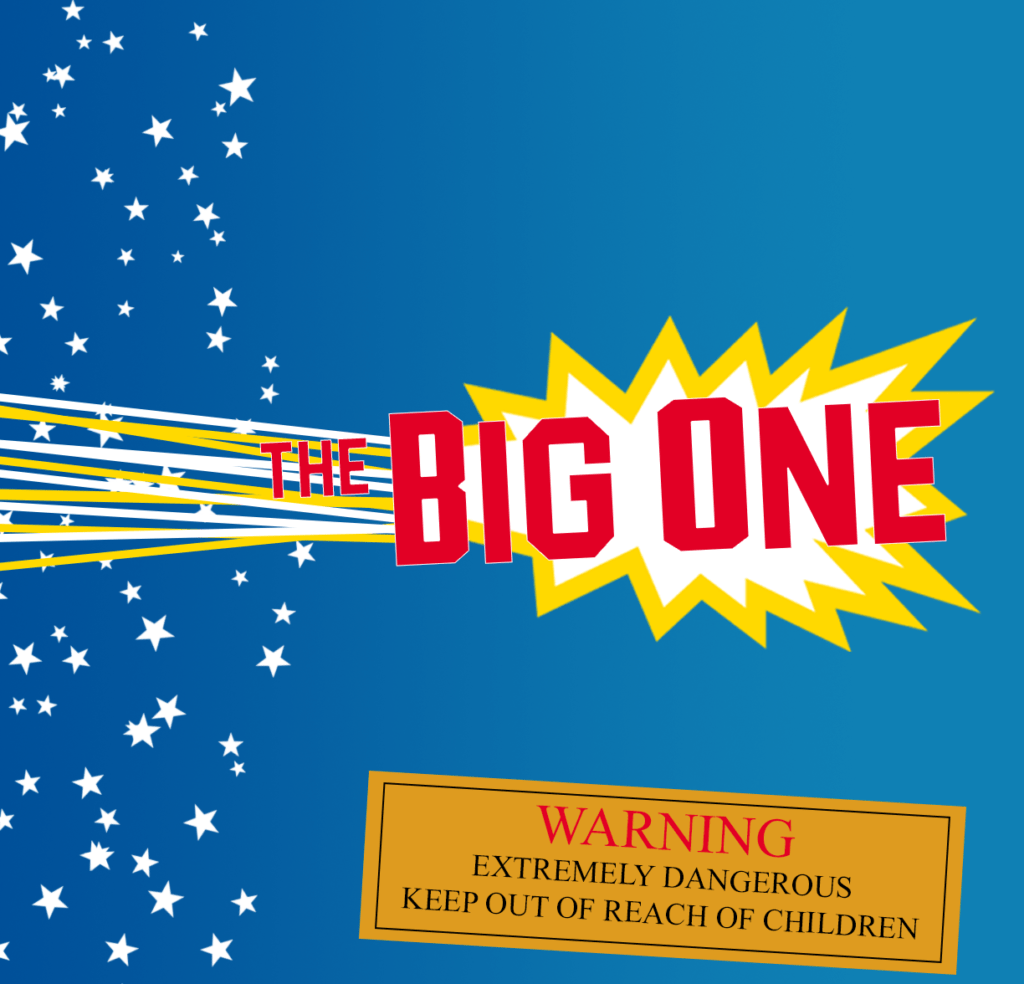
For the graphics, I fired up Photoshop, typed out the words “THE BIG ONE” and then started scrolling endlessly through the font choices to find the font that I wanted. After not being satisfied with any of the fonts that came with Photoshop, I went online. And after about an hour of searching I found some fonts that made me feel good about the typography looking right.
For the colors, I experimented a little with the eyedropper tool on the screenshot I had from the movie but didn’t feel like the colors were true to the prop in the movie. While being stumped on this and clicking around on the internet, I saw something that felt perfect for the colors of the rocket. The Toy Story logo itself.
Yep, the red that’s used on my recreation of the rocket is the same red that’s used in all the Toy Story branding out there. Part of the blue gradient is also the same. And the yellow, you guessed it, is the same yellow.
At this point I was feeling really good.
I used the same screenshot again to trace out explosion graphic that rests behind the words “The Big One” and then drew a bunch of lines in yellow and white to get the streaking that stretches toward the base of the rocket.
For the star field that encircles the bottom of the rocket, I created a new brush in Photoshop with a 5 point start, bumped up the variance for the size, spread, and rotation of the brush and drew a few strokes across the bottom of the rocket.
Again, I was getting happier and happier with this thing.
Lastly, I did some test prints to get the sizing right of the graphic. The width of the graphic would be the height of the rocket and with a little quick math back from geometry days, I calculated the circumference of the rocket tube and made that the height of the graphic (with a little extra built in for overlap).
After all that, I sent the graphic off to my local Walgreens to get it printed on a small poster so that the graphic was printed with photo quality and the right size that I needed it. I didn’t trust my printer at home for the quality I wanted and the graphic wouldn’t have fit on a standard 8.5 x 11 sheet of paper.
In the shop

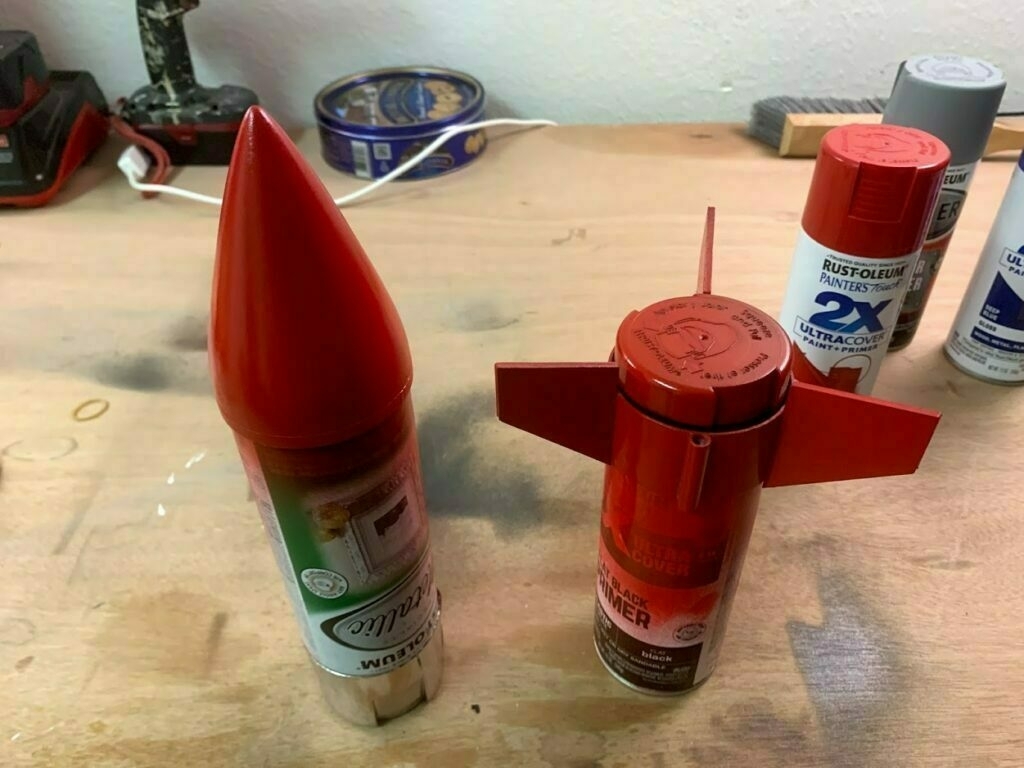
Back in the shop, I was really happy with how the 3D prints came out for the nose cone and the tail fins. These were the first prints that I did on my new FDM 3D printer besides some test prints that came preloaded on the SD card that came with printer and I could not be more happier. They were the right size that I wanted and they feel surprisingly very solid while still being very lightweight.
Compared to the 3D prints from my resin printer, the layer lines were much more visible so I bust out a can of filler primer spray paint and sprayed the plastic parts down with a couple coats and sanding in between.
I hit the parts with some glossy red spray paint I picked up from the hardware store, let that cure and made sure to get a couple coats and boom! I had the bright red plastic parts ready to go!
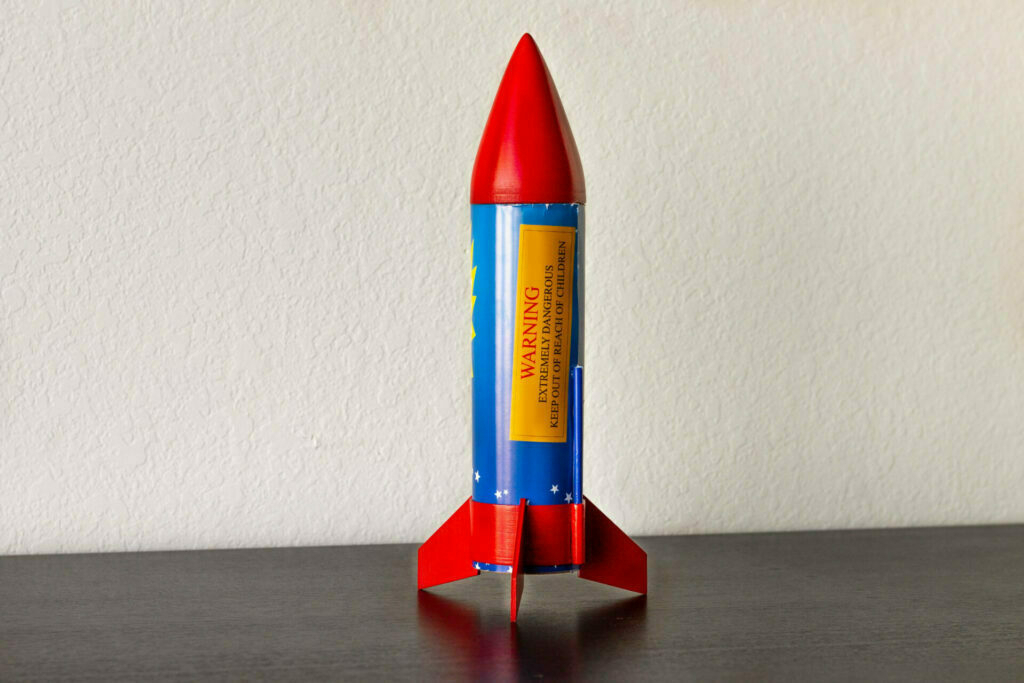
Next I cut down the cardboard tube to the height I calculated earlier with a very fine tooth blade on my jigsaw. The last cut was the graphic that I had printed out on the photo paper and now it was finally time to start the final assembly of the rocket.
Using some spray adhesive, I made sure to cover the entire back of the photo paper so that it would get a good grip on the cardboard tube. After carefully rolling the graphic onto the tube and smoothing out any bubbles, it was now time to just glue up the the plastic parts onto the body of the tube. And that’s when I hit the most frustrating part of the build.
Remember earlier when I was talking about modeling the plastic parts and I was modifying everything to fit over the diameter of the cardboard tube? Yeah. It came out perfect. But they weren’t designed to fit over a cardboard that was also covered with a piece of photo paper. The paper is not very thick at all. But! That little bit of thickness was enough to throw off the entire assembly at the end.
At this point, I was in too deep. If I wasn’t on a self-imposed deadline to keep trucking ahead with watching all the movies and finishing all the props, I would probably go back and resize the parts, reprint them out, repaint them, and then glue it all up to perfection.
Instead, I just brute forced the problem. Using a block of wood and my handy dandy mallet, I gently (maybe not so gently) tapped the pieces onto the rocket and got everything to fit with a little bit of cardboard crumpling.
Looking back, I definitely should have just taken the time to redo everything. Now all I see when I look at this rocket are the imperfections. But I guess that’s also the curse of being a maker. It’s inherent in us to try and appreciate the big picture but always run our fingers across the tiny imperfections that stand out only to us.
But stepping back, I’m REALLY HAPPY with the overall build!
Taking a final look
When I set out to build this prop, I had a distinct vision in my mind of exactly how I wanted this to turn out. I'd say I got it about 90% of the way there at the time of writing this post. The perfectionist in me could easily over-analyze and nitpick this thing to death.
But I love this prop. At the time of writing this post, I've let the prop sit in my apartment and every time I pass it I stop and stare for a few moments. This piece of animated film, something that was simply designed on the computer, now sits on a table in my place! How cool is that?!
If you feel the same about this stuff like me, be sure to stay tuned with this blog! I post here every Friday, alternating between talking about the next Top Movie that I watched or recreating a prop from that movie! You can also follow my journey over at Instagram too!